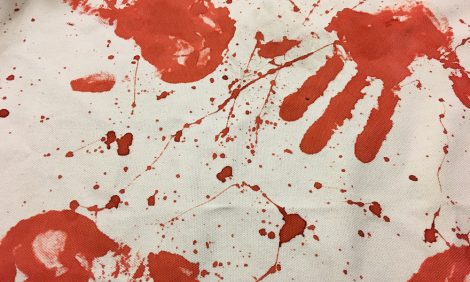
I’ve been doing Zombie looks for awhile now, and a lot of my friends were surprised I didn’t include them in my 31 Days of Halloween last year!
My Zombie Evolution
My personal Zombie has evolved over the years as I have tried different products, techniques, and even themes! Each time has grown a little bit gorier and I have refined some of my top products and tips to pulling off your own awesome zombie look.
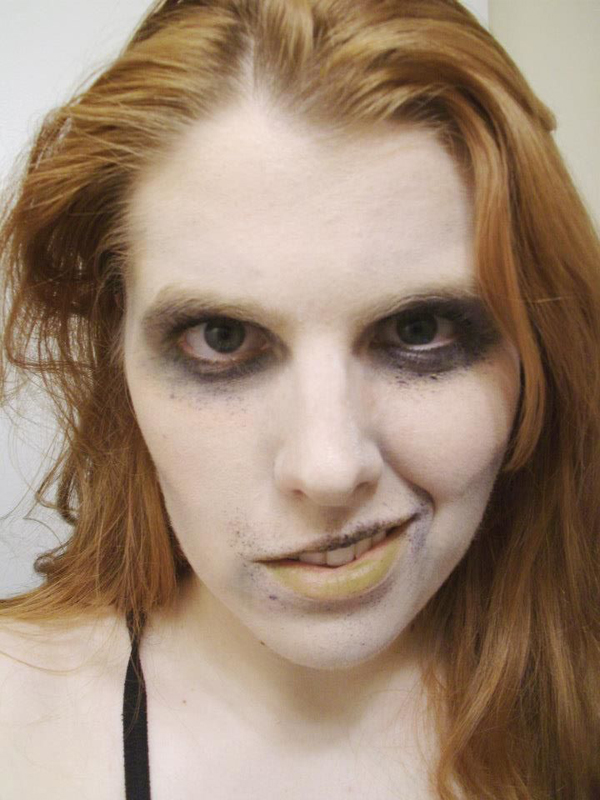
My first Zombie… Used the stippling technique but overall not too gruesome.
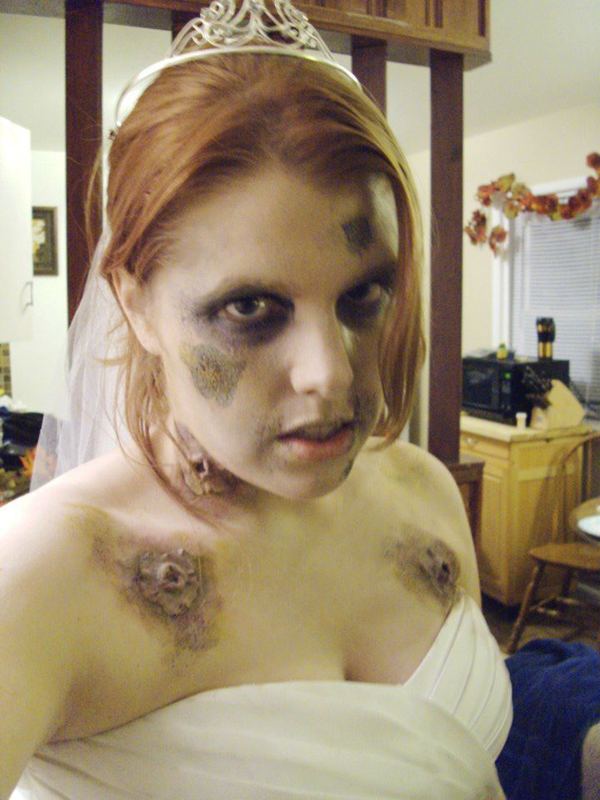
My first full-scale themed zombie… using a real wedding dress! Went for the “shotgun bride” concept here and used bullet hole prosthetics. Getting more gory, but this was just my first year.
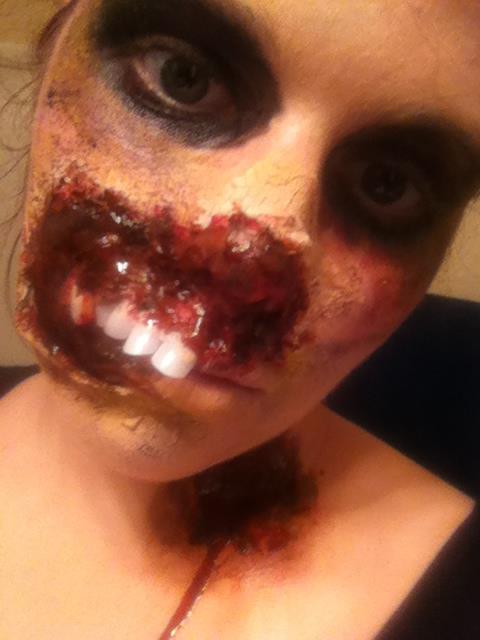
I’ve graduated to the gory zombie! This look was created using tissue paper and liquid latex.
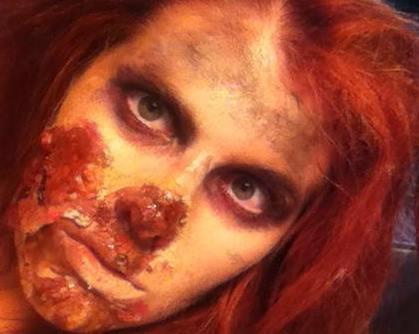
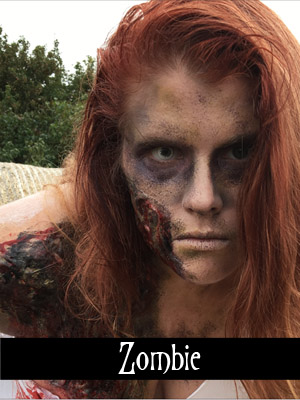
One of my favorites! This was done for Zombie Walk in the twin cities (zombie prom queen), and a very successful application of the gel prosthetic.

Top 5 Zombie Makeup Tools
1. Homemade Gel Prosthetic
My number 1 go-to tool is homemade prosthetic gel (used in the last pic above). This is not the prosthetic you see in terms of a completely finished look you glue on and paint, but an actual gel you make, apply while warm, and allow to cool on your face. It moves with you, is gentle on your skin, and since it is make of glycerin, it actually hydrates your skin instead of drying out and irritating your skin which you often get applications such as spirit gum or liquid latex. It is also super easy to remove!
Here is a full scale tutorial on how to make it!
All you need is:
- Glycerin (found in the pharmacy section of most stores)
- Gelatin (found in the baking aisle)
- Water
As it states in the video, mix in equal parts (I use 2 Tbs of each) and microwave in 20 second intervals (about 2-3 times).
CAUTION: This stuff is SERIOUSLY HOT!!! Please be patient and allow it to cool before applying to yourself or someone else, you CAN get very badly burned if you don’t wait for it to start to cool and congeal. Plus, you really don’t want it super runny in the first place.
Don’t worry about the bowl and spoon you use to mix it with. Allow the gel to cool completely, and it peels out in a perfect piece. You can also save hardened gel to use in future applications, such as cutting chunks or creating a much larger gash.
2. Flesh tone makeup: Dead Flesh by Wookie.
This is by far the best flesh tone makeup I have found. It goes beyond just using a white cream based makeup… it removes all hint of life from your flesh while still giving you the appearance you were once among the living.
It does come in a fairly small container, but you would be surprised just how far this will go. You can easily get at least two full face applications per jar, and be able to do full face, neck, shoulders and arms with a jar, and still have a bit left over for next time. Apply this with a cosmetic sponge for best results.
3. Bruising palette
You don’t have to spend a ton to get a fantastic makeup palette of bruise colors… my favorite so far was from Walmart! This is what takes your basic “white out” zombie to the decomposing dead. Make sure that it has a full range of colors, including:
- deep purple
- a mottled, pea-green
- a deep yellow, think goldenrod or mustard
- black
- red
4. Stippling sponge
This applicator tool takes your look to a whole new level by giving you the mottled, starting to decompose look and making it look effortless… because it really is. This tool is so easy to use and makes your zombie look far more professional.
5. Variety of Brushes
Once you get going, you will realize how quickly you get your brushes dirty, and it is incredibly frustrating having your colors mix when you don’t want them to, or having to continually clean a brush off (especially with grease based face paints). You don’t have to spurge on expensive makeup brushes… a nice “painters pack” with a variety of different brush sizes and shapes goes a long way and is fairly affordable.


 Hi! I'm Alyce.