Ever have something on your mind that you want to do, and just can’t be happy until you tackle it? Thats this hand anatomy look. I’ve had tons of issues with my hands (see an old overview on all of the surgeries), and with all of the physical therapy, ergonomic assessments, neuro exams and surgeries, i’ve become pretty familiar with the inner workings of hands, wrists, and arms. I brought some of my brushes and paints with me to Thanksgiving and when family started dropping off for naps and such, I decided today was the day to tackle this look. I mean, its just my hand, so it shouldn’t take that long.
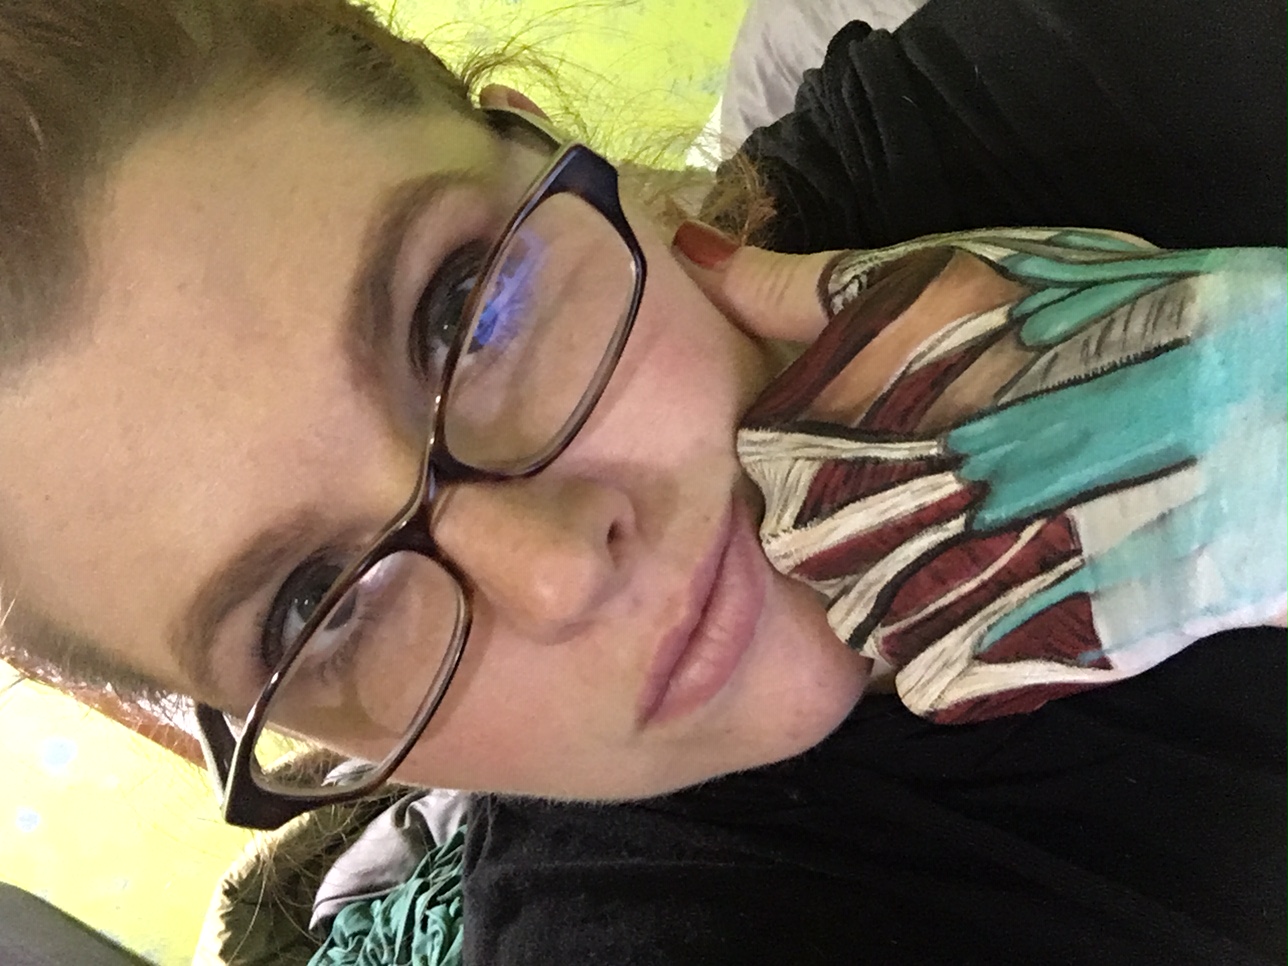
3 hours later, I had a completed piece and a partially shaved forearm. Yep. I was about an hour in and realized how long this was actually going to take to do it right, and didn’t want it all ruined with fuzzy arms! On the plus side, you can’t tell at all.
View this post on Instagram
Creating the Hand Anatomy
This one is pretty hard to do a tutorial for, but i will try to outline how I approached the look overall. To start, I was referencing this image:
 I just love the colors, and it had clear structures to follow.
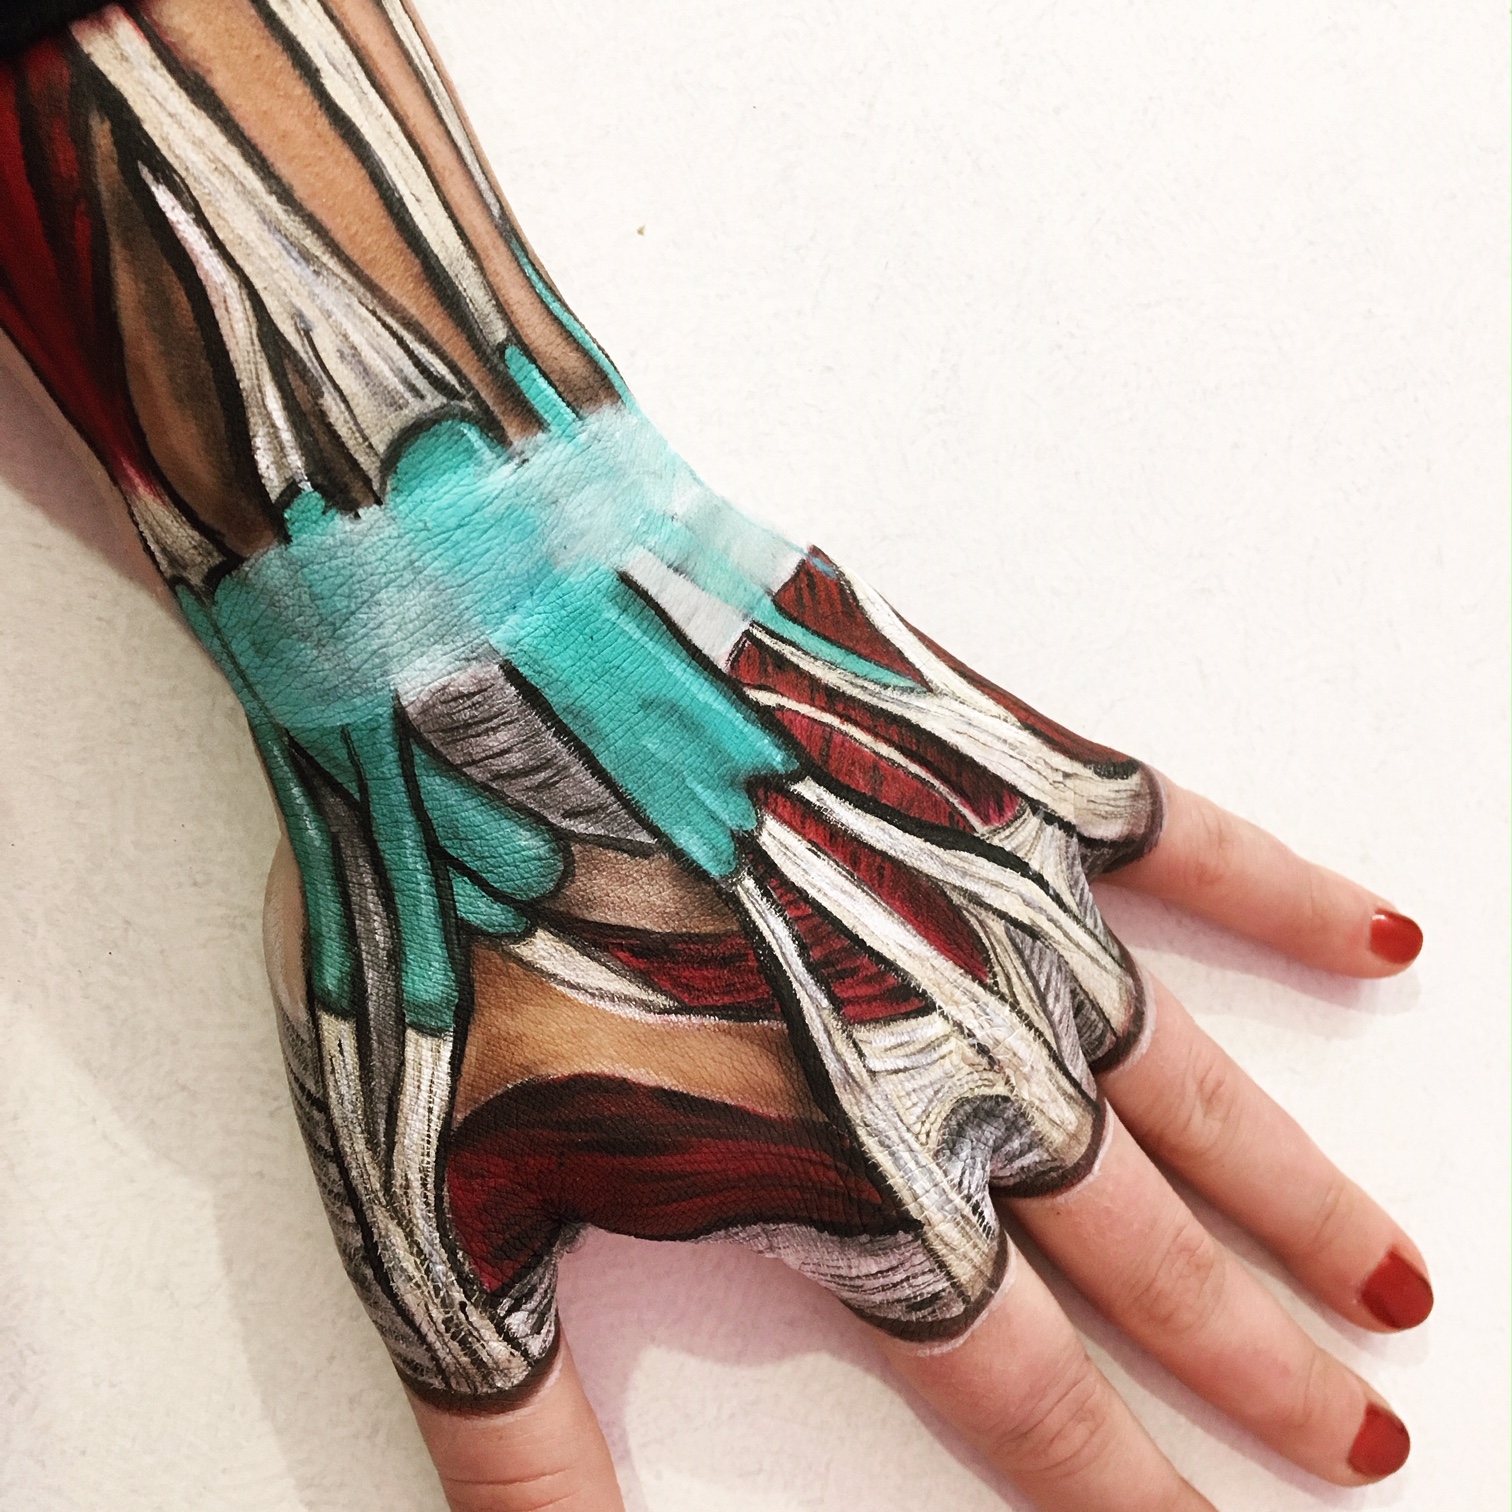
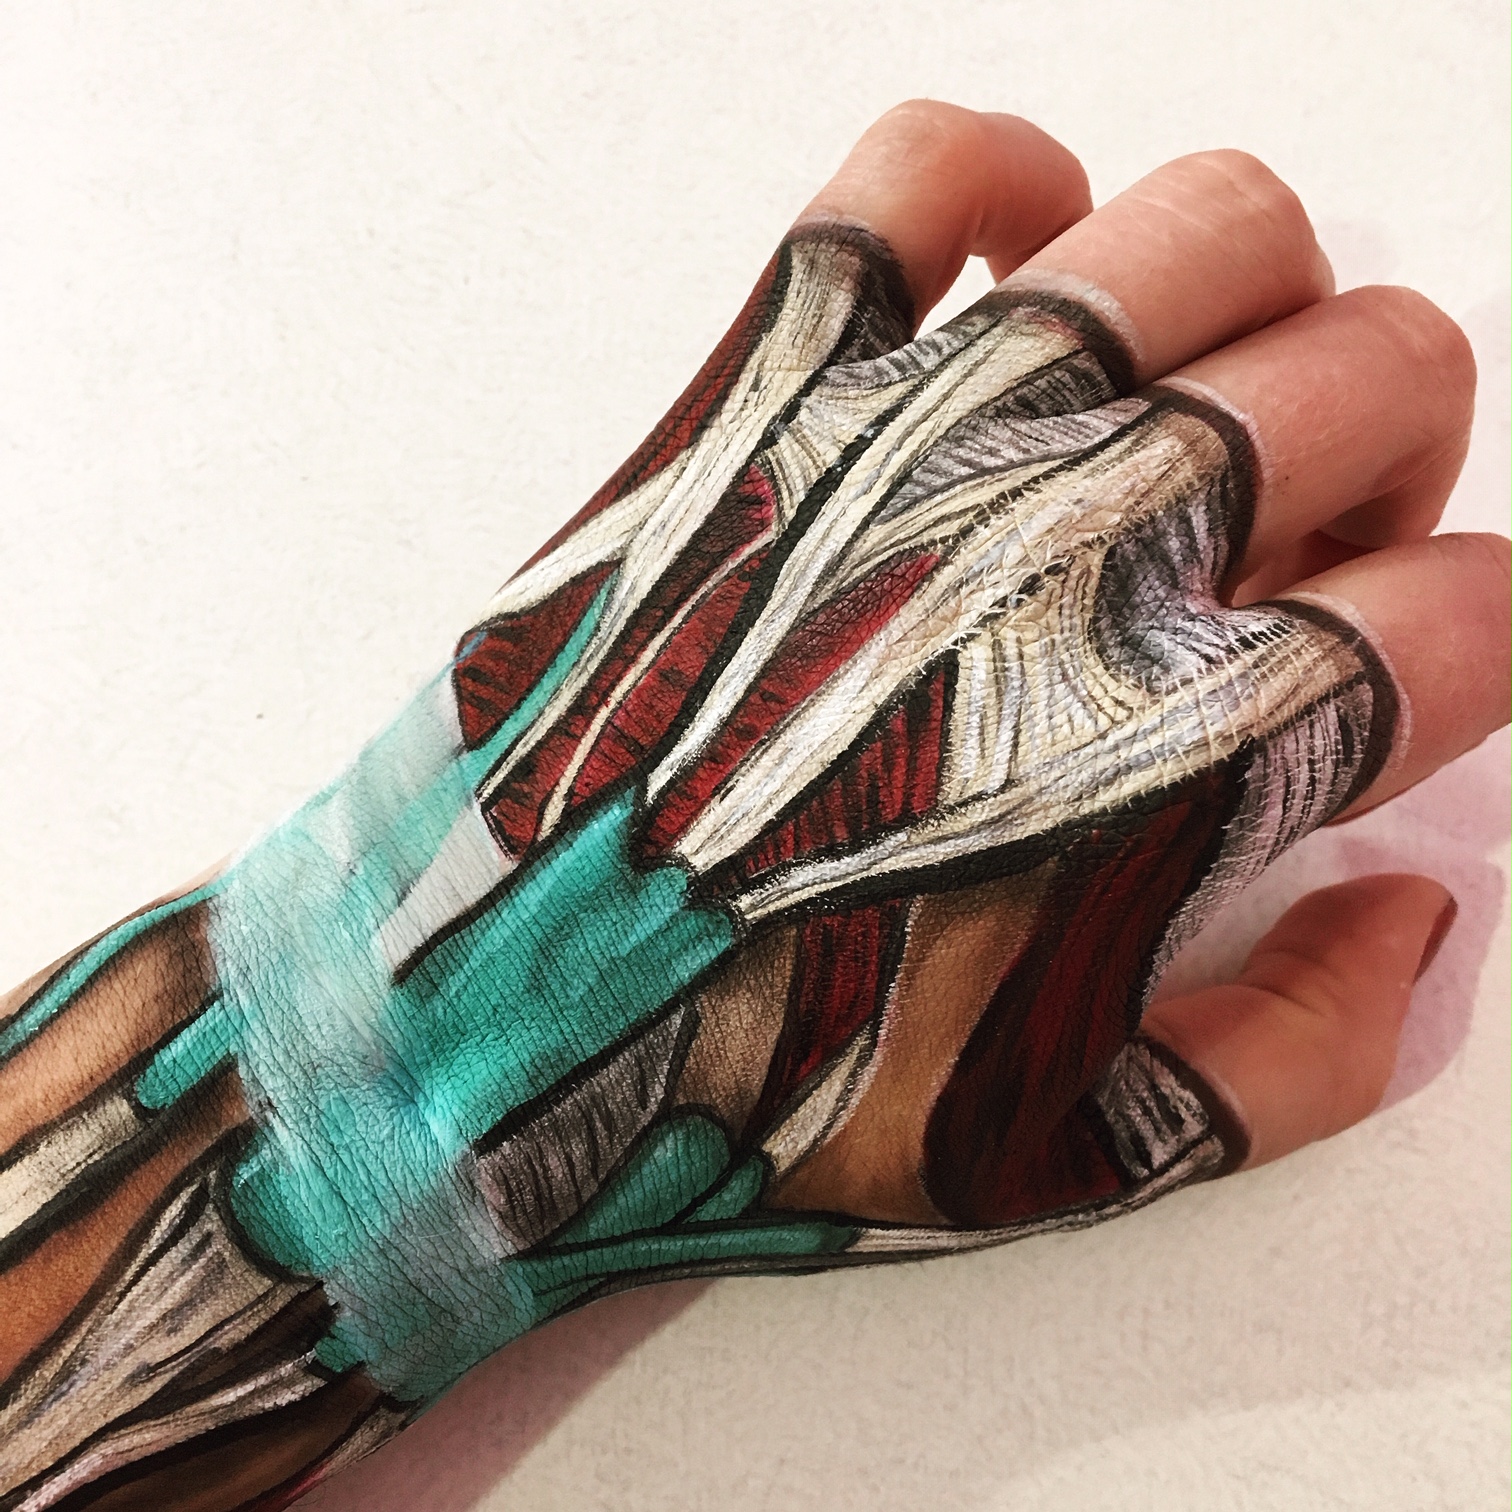
- I started by fist lining where the top of the illustration would be, then using a bone/cream color and drew out the shape of the tendons. Dont worry about details, this was all very flat and blobby for a good hour or more. I also only started with the hand to the wrist, then went down the arm more after I had the hand more defined.
- I then drew in the blue sleeves (I think they are nerve/tendon sleeves of some kind).
- After that, I went in with red to represent muscle.
- Now, I began to outline the shapes in black. I outlined just about everything.
- Draw the facia (the bands) in white across the wrist. I had to add more details first since I didn’t have this as far down my wrist at the time. To make it look translucent, I loaded my brush with white, then smeared it on the mirror on the top of my palette, and then added more water to get it really thin. I also wiped my brush off between each stroke to keep any color that came off my wrist from mixing with the white.
- Now for the crazy detail part… I used a super fine brush and alternated white and black stripes up and down the tendons following how they were in the image. It takes a while and a few layers to really get them looking as fibrus as I wanted.
- Using black, i did a similar thing to the muscles.
- Finally, I used black eye shadow to shade edges and give areas more depth.
I know that wasn’t the best tutorial, but really focus on putting down base colors in the general shape you want, and build it up from there. That’s one of the reasons I love using water paint!
I would love to do more anatomy, what would you guys think could be cool?


 Hi! I'm Alyce.