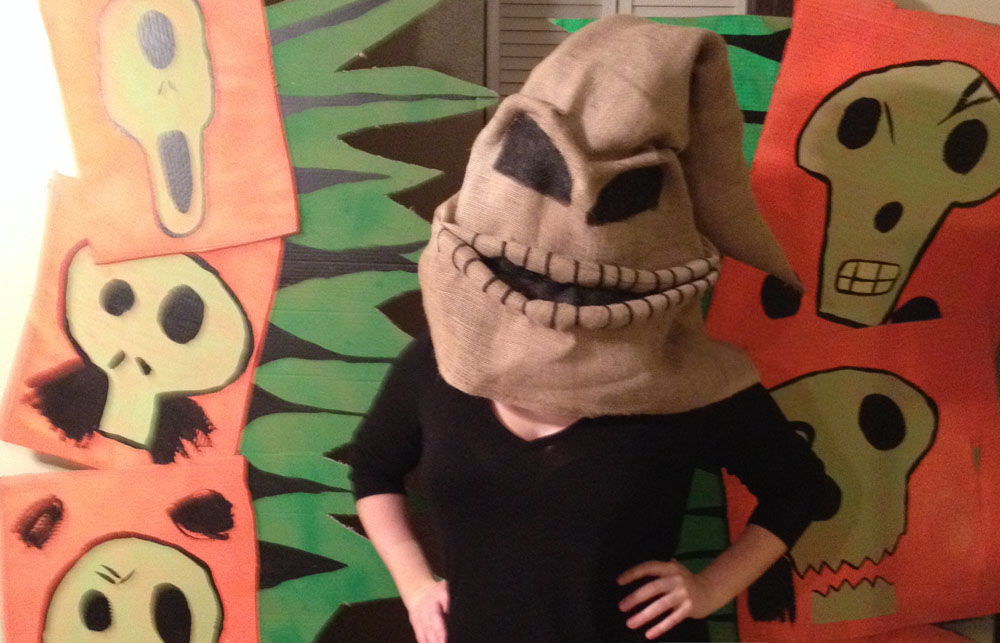
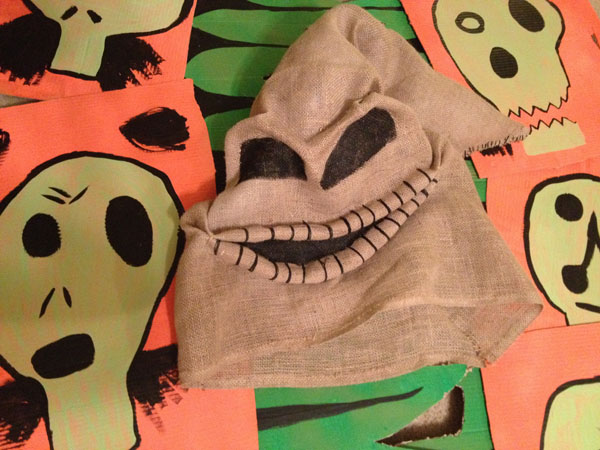
Further delving into my obsession with Oogie Boogie, I wanted to make a costume that wasn’t completely cumbersome. Since the most distinctive characteristic is his burlap and face, I decided to do a mask-only application, and simply wear solid black for the rest. A bit of a cop out, I know, but I just couldn’t get excited about creating an over-sized burlap sack… perhaps I can finish it next year!
Oogie Boogie Mask
What you need:
- 2 yards of burlap
- Sharpie
- Black acrylic paint
- Black yard or embroidery thread, and needle
- Tan embroidery thread to match your burlap
- Wire, either 12 gauge solid electrical wire or you can cut a wire hanger, which is what I did.
- Wire cutters
- Plastic bags
- Glow spray paint and masking tape (optional)
Instructions:
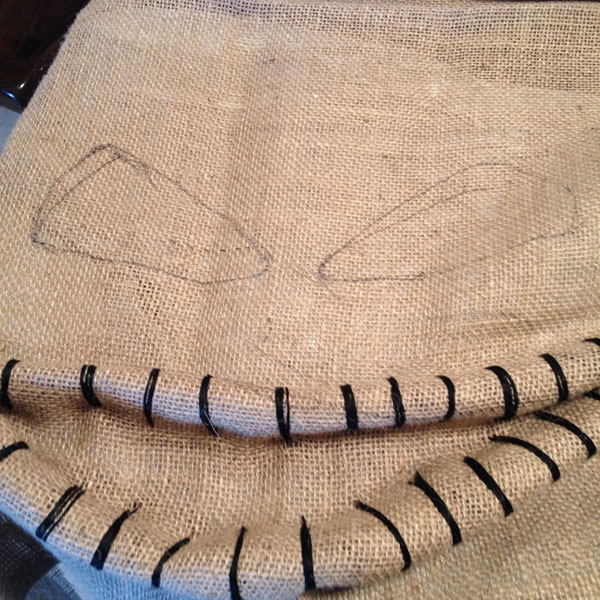
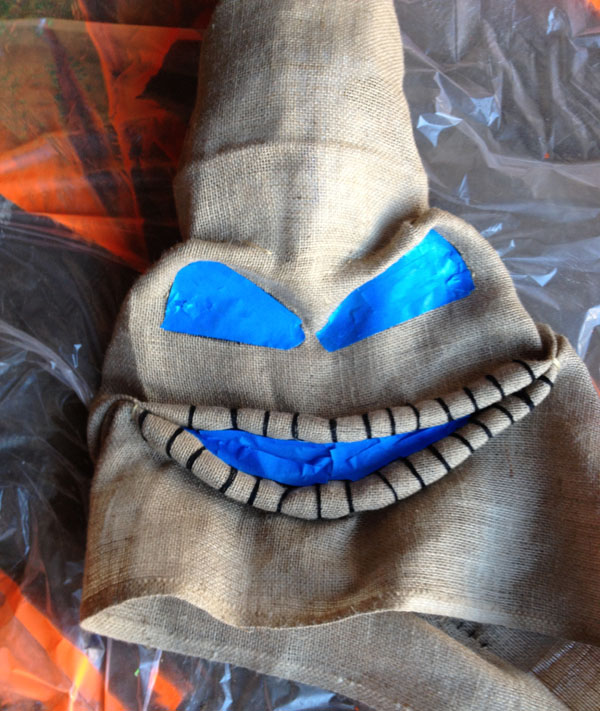
1. Start by draping the fabric over your head (very technical, I know), and mark where the mouth should be placed with the sharpie, just so you can reference.
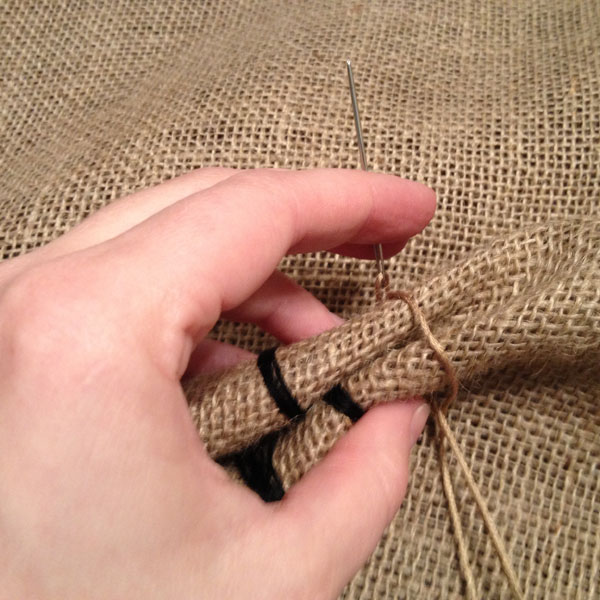
2. Cut two lengths of wire, roughly 10-ish inches long. I used wire cutters and cut out the bottom of two wire hangers I had on hand, but 12 gauge solid electrical wire or similar could also do the trick. Wrap these up with two strips of the burlap (you can slice this off the edge of the 2yd piece) to make them nice and thick for the lips, and use the yarn or embroidery thread to hold it around the wire.
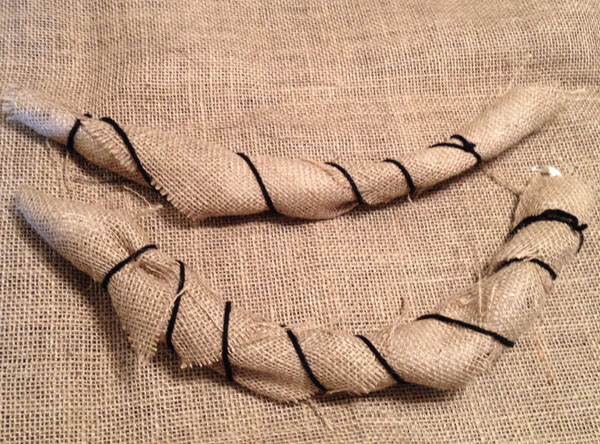
3. Place the “lips” under the burlap face, and pinch the top layer around the lip below and sew together using your black yard or embroidery thread. Do this for both lips, making sure to leave a nice gap for the mouth.
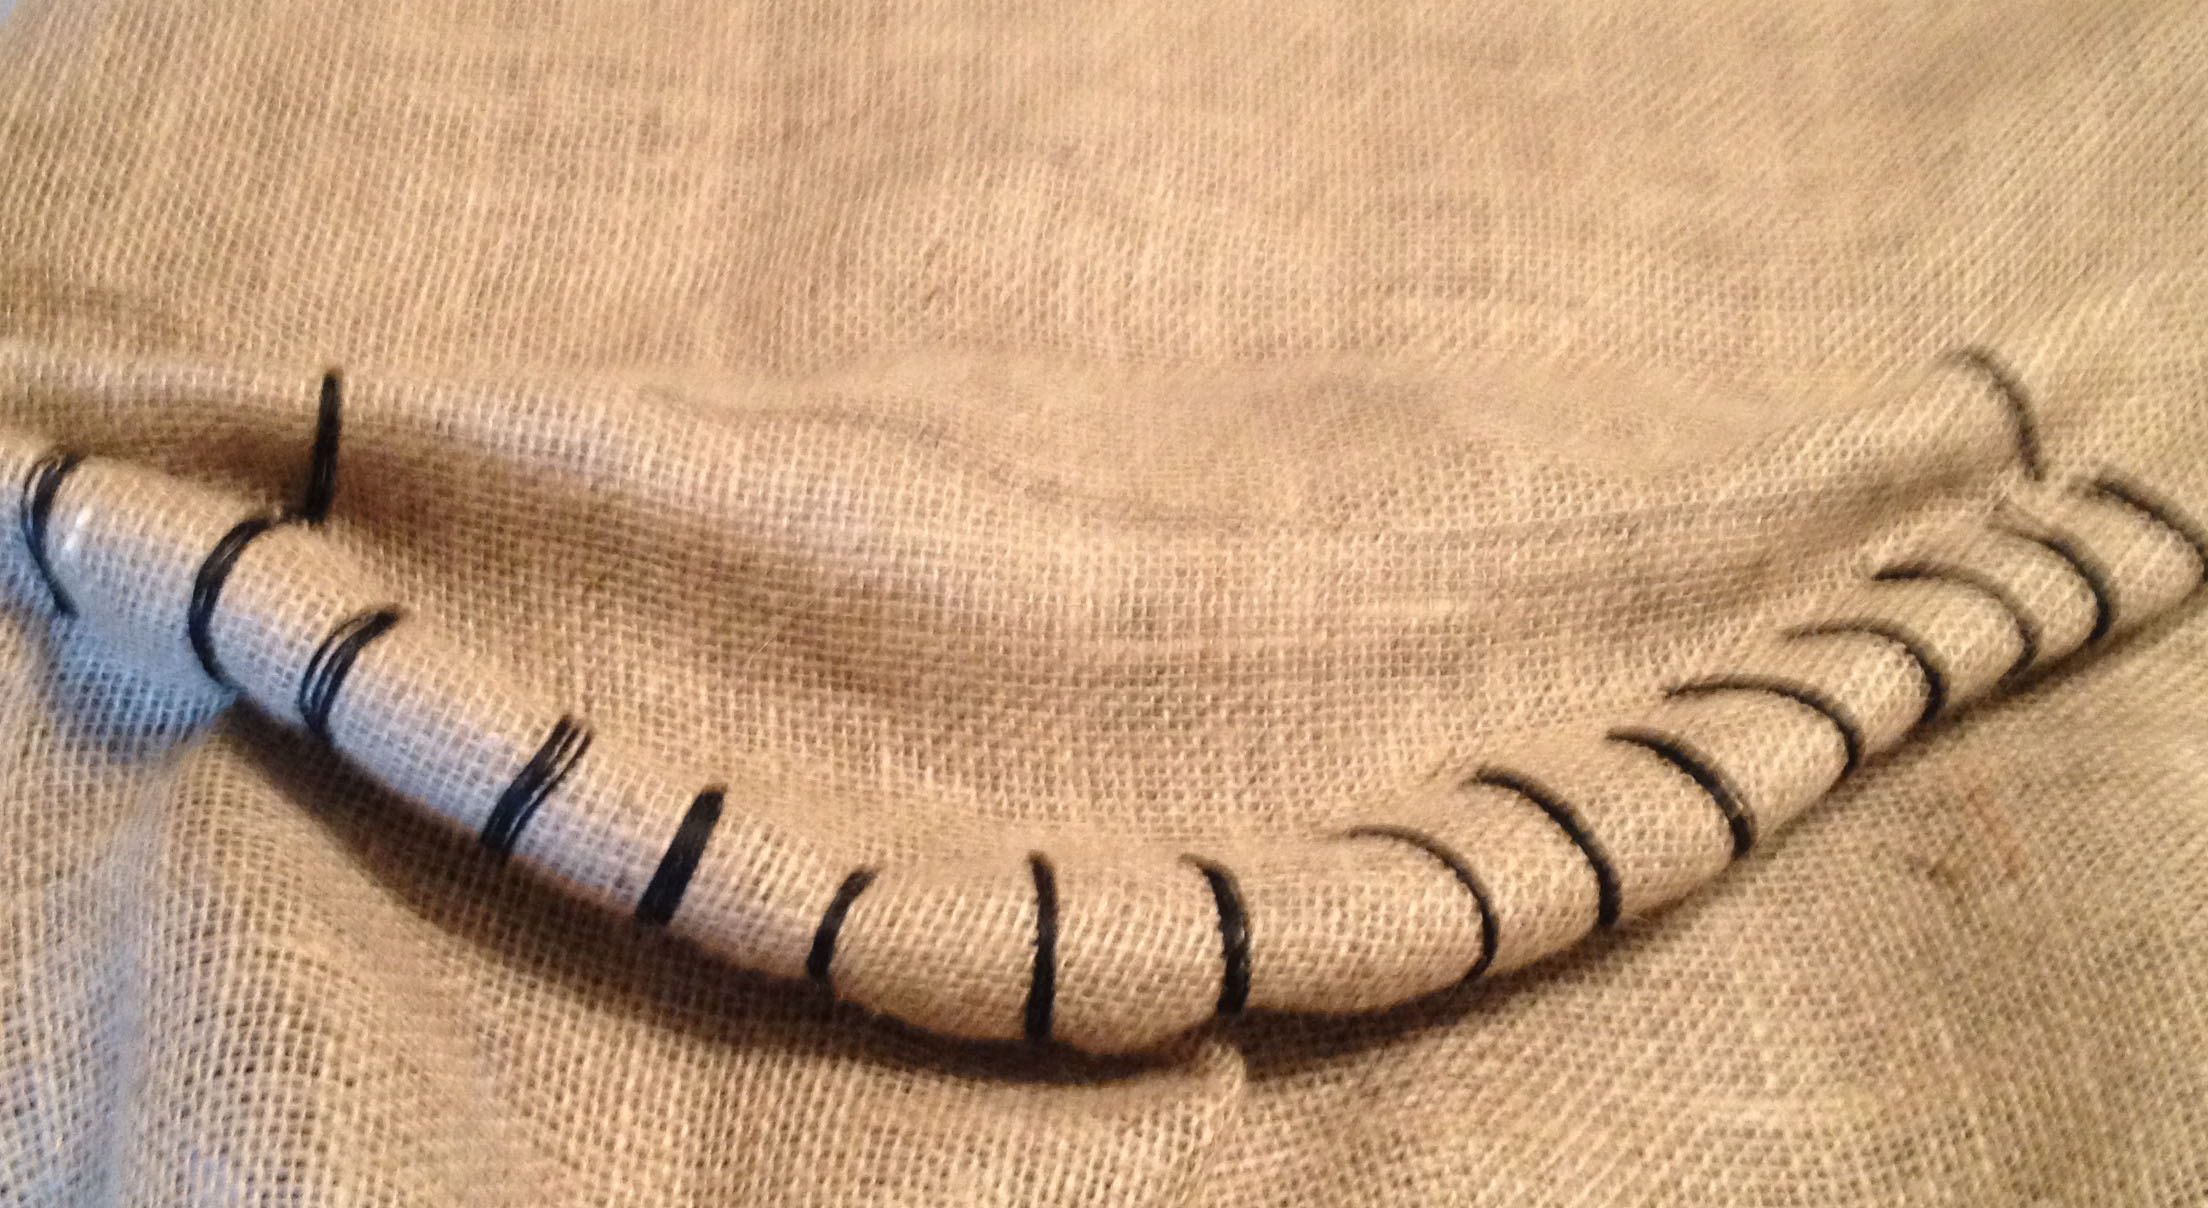
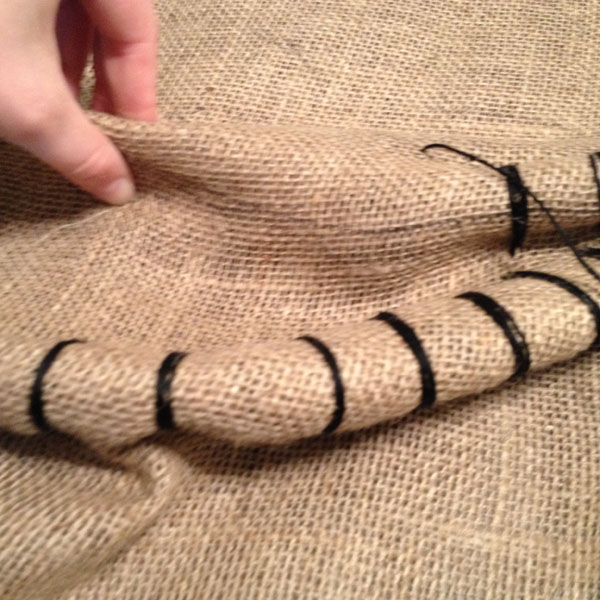
Then, use the tan embroidery thread to tack together the two corners of oogie’s mouth.
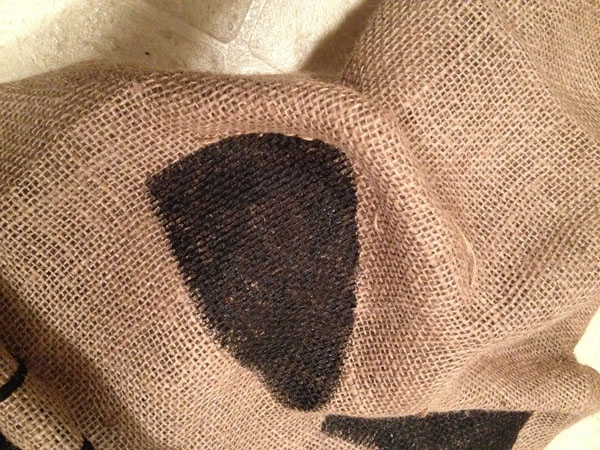
4. Using the mouth as a reference point, paint on two slightly triangular eyes with the black paint, making sure the points are in the center with the outside edges a bit more rounded. Then paint the inside of the mouth black.
4. Take two additional small strips of the burlap and roll into 5-6 inch rolls (no wire this time). Place these underneath the burlap and pinch the burlap around them similar to the lips, but this time, use the tan colored embroidery thread and sew under the roll to make defined eyebrows.
5. With the face complete, taper the top to a point and connect behind your head. Pin in place, and cut off excess burlap.
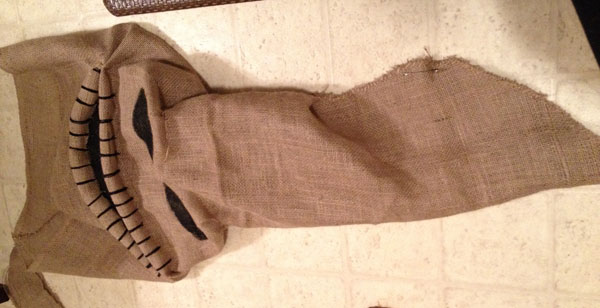
Then sew the back seam together with the black yarn. I actually sewed mine first with tan embroidery thread since I bought way more than I needed, then went over once with the black thread.
6. Use plastic bags to stuff the top of the mask and give the point of his head more bulk. To give the top a natural looking curl, fold it so that it looks the way you like, then throw in a couple of stitches with the tan embroidery thread to hold it into place, This way you can take it on and off without needing to always re-adjust.
If you are not using the glow paint… your’re done!
7. If you decide to make Oogie glow, make sure to first tape off the eyes and mouth so that these parts do not get any paint on them. Then douse the thing in as much paint as possible. You might as well use most of the can.
Let it dry in a very well ventilated area, since you will put putting this on your head and all. Peel off the tape, and that’s it!
 Hi! I'm Alyce.