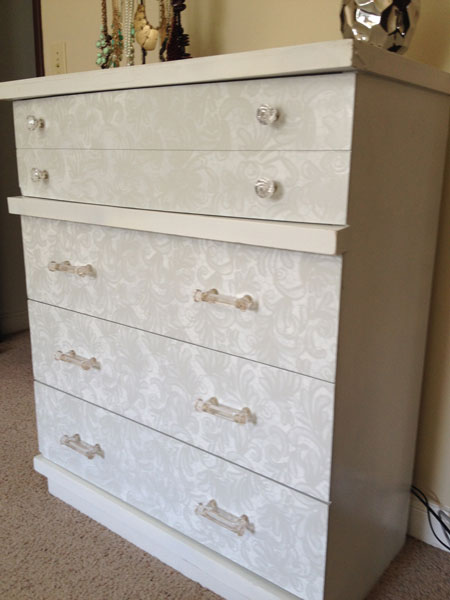
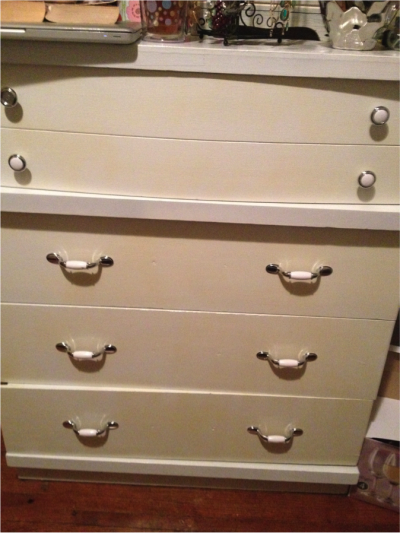
A few years ago, I had painted my childhood dresser white and updated the drawer pulls to make it better fit my new room scheme. Unfortunately, at that time, I knew nothing about painting furniture and had dived right in, painting directly over the existing gloss coat. This worked… for awhile. Fast forward 5 years later, and the paint on all of the drawers was yellowing in an awful way.
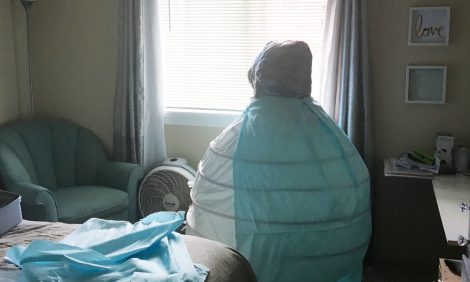
Ignore the mess, I was packing! (That’s just my lame excuse)
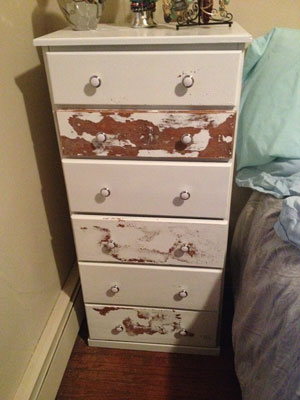
To further the point that I don’t always learn from my mistakes the first time, two years ago, I painted a tall chest of drawers white to match the dresser. Although I did read the instructions on the paint, I had not taken the humidity as a factor, and again, decided to skip priming. From this, I learned that the moisture in the wood will cause the paint to bubble. So after sanding off the bubbled paint, I had a half painted white dresser chest.
First, we must strip
So after two years of living with a slightly yellowed dresser and a half sanded chest of drawers, it was time to correct earlier mishaps. First things first, I had to strip the paint. This time, however, I actually learned my lesson and did my research. I found an article called “A tale of two strippers” on Centsational Girl’s blog which is safe for work, and worth the read. In this article, she compares Klean-strip and Citristrip, with the latter as the clear winner. If you are going to be stripping your furniture, I HIGHLY recommend this product, it worked like a dream.
You will need:
Prepping the furniture
- Citristrip
- Small paint brush (go with cheap, as you will throw it after)
- Latex or rubber gloves
- Safety goggles
- Face mask
- Putty knife
- Old rags
- Mineral Spirits
- Trash bags
- Handheld orbital sander
Priming & Painting
- Latex based primer
- Latex based paint (base color)
- Aerosol spray paint (lace color)
- Lace, enough to cover your furniture
- Brushes/Rollers
- Paint tray
This all sounds like a lot, but it’s totally worth it. Stripping furniture is a messy job, there is no way around it. These tools make the process sooooo much easier!
Safety first. While Citristrip is marketed as being far healthier to breathe, and certainly smells better, I still used full protective gear with gloves, safety glasses and a face mask. I had the added fun of trying to see through fogged up glasses, since I did most of my work in the late April evenings in SD… it got a little chilly.
1. Depending on the furniture you are refinishing, remove as much as you can to give yourself the best access to clean it later: remove drawers, hardware, anything you can safely remove and reattach later.
2. Liberally coat with Citristrip and get a good layer on all surfaces you want to remove paint.
3. This tip from 2littlesuperheros is seriously a game changer! Cut up plastic trash bags and cover all surfaces you applied the Citristrip to, making sure it is stuck down to the wet Citristrip. Follow the instruction on your bottle of Citristrip to be safe, but I painted my furniture in the evening and it was perfect by the time I got to it the next day, although it certainly doesn’t take that long.
4. When you peel off the trash bags, you will be delighted to see that the paint is already coming off! Use a putty knife to scrape the paint off, and relish in how it easily slides off, like slicing a soft cheese!
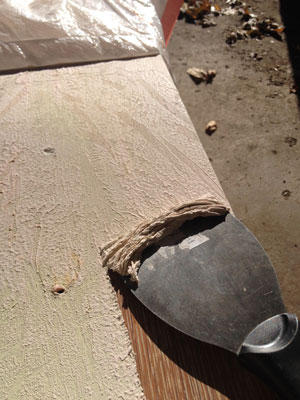
5. Dampen a rag with mineral spirits to get any lingering paint off of the wood.
6. Use the orbital sander and get down to the original wood, then lightly wipe off the surface of your furniture with a barely damp rag to remove any debris from the sander.
7. Fill any scrapes, defects, or unwanted holes in with wood putty. I tried my best to diminish the appearance of a chipped edge on one of the drawers. Allow putty to dry according to instructions on product, then sand area to get a a smooth finish.
Selecting your paint and pattern
When choosing your colors, make sure to select the color of the lace in an aerosol spray paint. The base coat can be regular paint, and gloss or matte is up to you! I also wanted to make the paint job as smooth as possible, so I sprung for higher quality rollers.
You’re Ready to Paint!
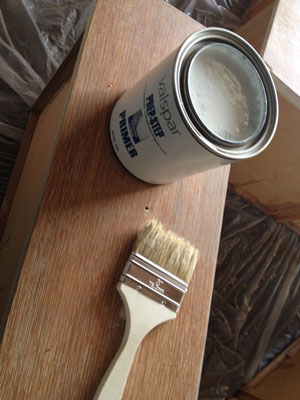
I mean prime. You are now ready to prime. Again, fool me twice…
Since you shouldn’t paint at below 50 degrees, I played a bit of weather roulette to get these completed. I had started this in an unseasonably warm March weekend (in the 80’s, so rare for March in SD!). Since I had to space out the work to allow my back time to rest as well as complete other projects, I didn’t get it completed in that weekend, and had fun watching the temps over the next two weeks and rushing home after work to take advantage of 51 degrees! Cheating? Maybe, but I wanted to give it my best shot.
Painting
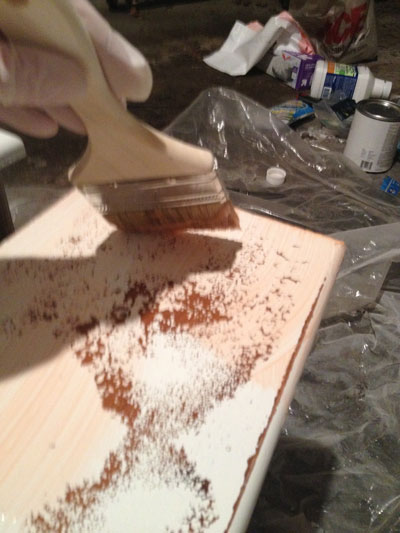
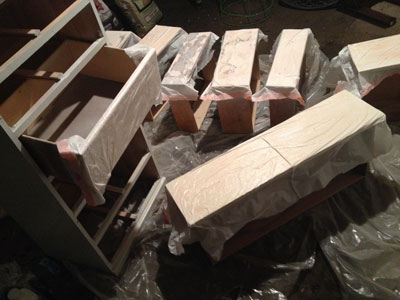
I used a latex based white primer and gave it a nice, even coat and let completely dry. Depending on how well the primer covers your furniture, its better to opt for a second primer coat if necessary.
1. To get a really glossy finish for the base coat, gently sand over the primer with a fine grit sandpaper. I applied barely any pressure, just enough to smooth out the brush strokes without removing any of the primer coat. Dampen a paper towel so there is no excess moisture, just damp enough to remove the powdered primer off of the furniture, and wipe off for a clean surface to paint your base coat.
2. Then, paint your base coat! I used a gloss paint in a light stormy grey.
(Tip: At this stage, also paint your base coat on a spare piece of wood. Give it the same number of coats as you gave your furniture. This way, you can do a test with the lace before actually spray painting your furniture.)
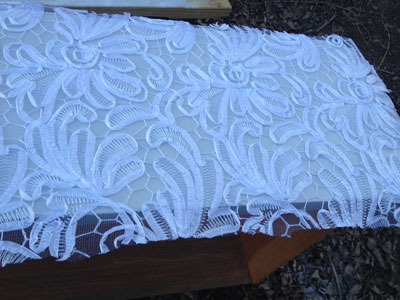
3. Once dried, take your lace and cover the surface you wish to paint. I recommend using a large enough piece to cover the entire surface you are painting in one go. Once you have moved the lace, it will be difficult (or next to impossible) to align your pattern again, so keep this in mind when purchasing your lace.
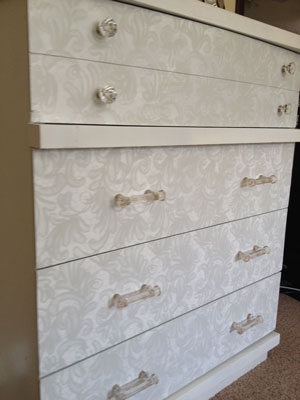
I’m not a huge fan of floral lace, so I opted for more of a Fleur de lis pattern instead. It was more pricy, but I knew I wouldn’t need a lot, since I was only doing the drawers and could reuse the same piece on each drawer.
4. Cover your furniture with the lace, and make sure that the lace will not blow away while you paint. Securing lightly to the unpainted surface with scotch tape might help.
5. In slow, even strokes, spray the paint evenly over the lace on the entire piece (or portion) in one go. Then immediately after you are finished, gently lift the lace straight up off of your furniture to prevent any smearing. Let dry according to instructions on your spray paint.
6. If re-using the same piece of lace for multiple applications, let dry for roughly 10-20 minutes so that it is dry when you place it on the next piece you are painting.
7. Finally, it us up to you if you would like to add a clear sealant or top coat. I went without, but it is your choice! I usually opt for an aerosol top coat, as it is so much easier to apply and still have a nice finish.
Reassemble!
Once the paint has completely dried, you can now re-assemble your drawers and reattach any hardware you removed. I opted to replace the cheap white and chrome knobs for clear glass knobs and handles. The glass knobs were purchased at Menards, and the handles from Hobby Lobby.
(Tip: if shopping at Hobby Lobby, make sure to wait for their sale week! Most of their merchandise goes on 50% off sale ever other or every third week. If it is full price when you find what you want, wait a week and check back. If they don’t have enough of the item you want, you can order more, pay in the store, and have it shipped to your house!)
Enjoy!
There is nothing quite as satisfying as making something fresh and new with your own two hands, and I loved that I used the same design to make 3 unrelated pieces of furniture into one cohesive matching bedroom set! Full bedroom reveal coming soon…
Allow yourself time to relax and enjoy the process as well. I will admit, it took me a total of a month to actually complete this process for the dresser, the chest of drawers and my nightstand, and it technically isn’t 100% done. I played a bit of weather roulette, had to take time for my back so I wouldn’t exhaust myself too much (leaning over furniture with a sander is NOT ergonomic!), and I also had to factor in my new job duties, vacation to Cancun, and the move!
I still do not have the lace pattern on the chest of drawers, although I had intentionally waited to make sure I wanted that one in the bedroom after I moved. I will likely not finish it until the move to the next apartment. No point of hauling it outside twice!
Finally, glass knobs are kind of pricy! I had a few other bills to settle before I could commit to the knobs, and used the dresser for about 6 weeks before finally making my purchases. Now that I have them, I am in love with this dresser!






 Hi! I'm Alyce.


