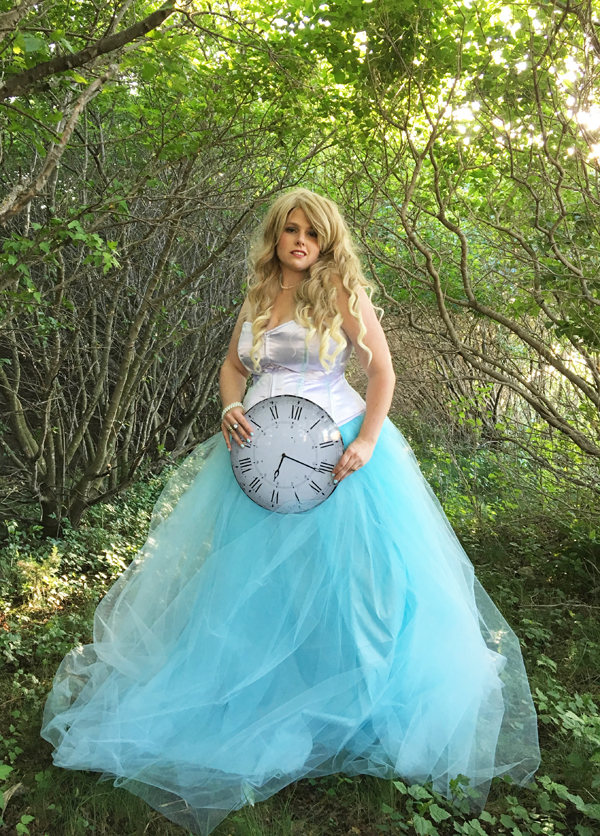
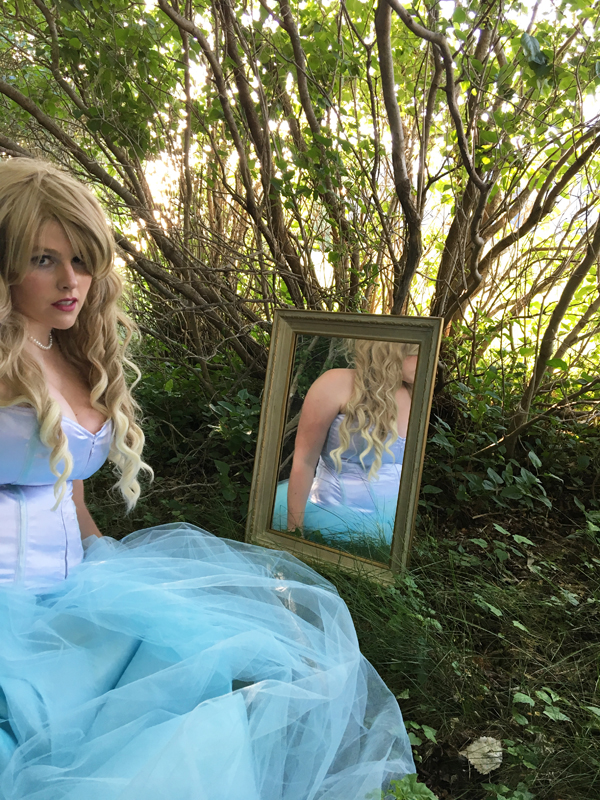
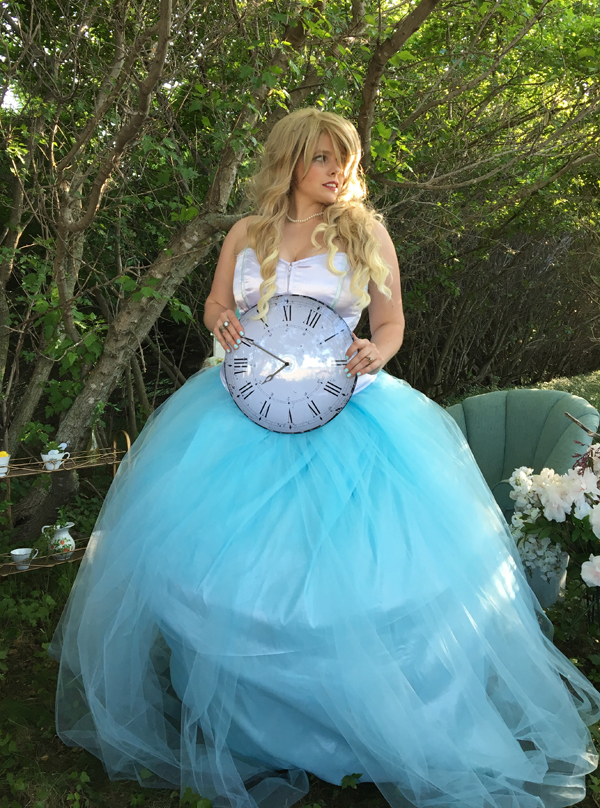
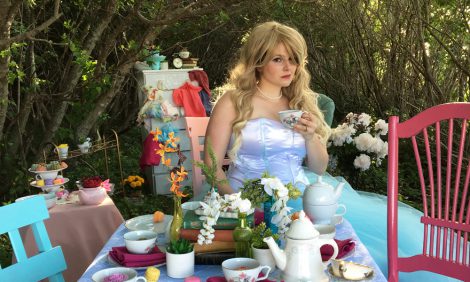
I was in love with the idea of a whimsical Alice In Wonderland Wedding dress, with flowing folds of bright teal mixed with a crisp white satin. The more I thought about it, the more I felt that this would be the perfect opportunity to take my novice sewing to the next level and try to learn something new. The goal? Create a dress that is recognizable as a themed Alice in Wonderland wedding dress but that is still very clean and classic.
Ultimately, I know this dress is miles from being executed in a professional way, but I think that is a lot of the nature of my blog. I like to plow on full throttle towards my end concept, figuring things out a long the way. I make mistakes, and often find out through the process where the value would have been in learning some core concepts first… but ultimately I don’t let that hold me back. I think many people are often scared off from trying projects because they aren’t sure they can do it right, or that it will look good. Trust me, there are plenty of projects that I have actually completed that didn’t make it to the blog. But I learned from them, and often, learned tricks or techniques that helped me make the next project a success.
Do you want to make an Alice in Wonderland Wedding Dress? Then let’s get started.
Alice in Wonderland Wedding Dress Tutorial
You will need:
- 6-8 yards of a blue solid base fabric, such as a satin or taffeta.
- 30 yards of matching blue in a flowing fabric such as organza or tulle.
- 12 inch zipper in a color matching your fabric.
- Small clasp hook
- Needle and blue thread to match your fabric.
- Thimble… these just come in handy.
- White satin corset (I bought mine from AMI Clubwear)
- Translucent 1/4 inch blue ribbon.
- Hot glue & glue gun.
- Hoop Skirt (tutorial here!)
Also helpful, a mannequin. I made my own with this fast and cheap mannequin DIY.
Instructions:
1. Start by pinning the fabric around your hoop skirt while it hangs on the mannequin. I actually made the mannequin for this purpose exactly when I realized there was simply no way to do it while wearing it or laying it flat. I’m sure a professional would have a much better technique, but this worked for me!
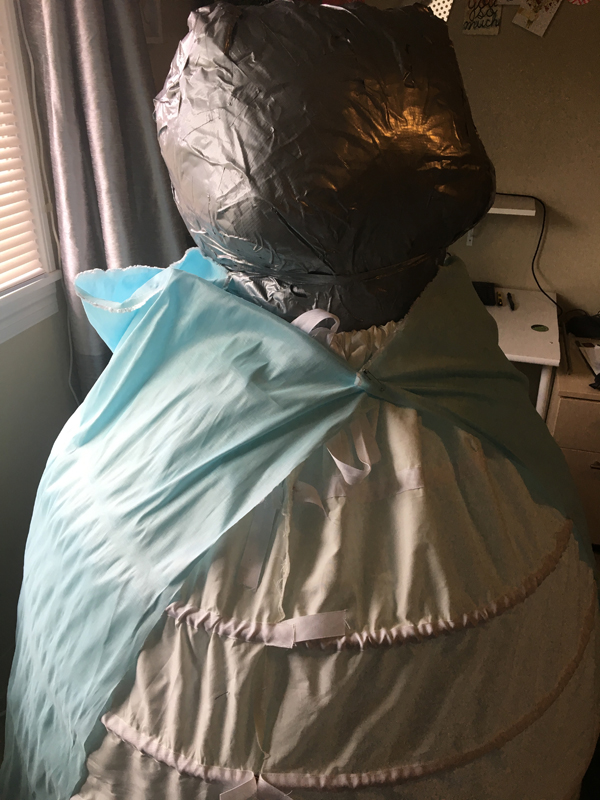
When pinning it, make sure that the fabric “seam” closes down the full length of the skirt without pinching or pulling on the hoop skirt below. In the photo below, I actually didn’t buy enough fabric, and had to go back to get more. Rookie move. Thankfully, the seams will be hidden, so I actually have a pair of seams in the front in the shape of a triangle that are hidden by the skirt overlay.
2. Gather the fabric together at the top of the skirt into gentle folds. I’m sure there is a better way to do this with seams, but since this will also be covered by the overlay this works well to be able to make it work without exact measurements. Pit it nearly all the way around the waist, leaving the last 4 inches free on each side.
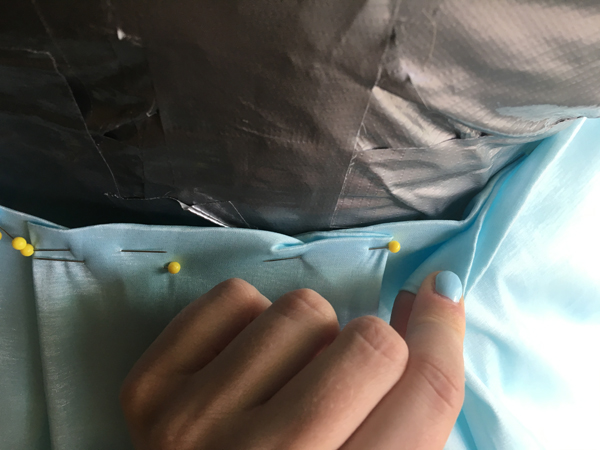
Take the dress off of the mannequin and put it on around you, then pin the final few folds so that it fits your waist perfectly with just about an extra 1 inch play on each side when you hold it closed. Don’t pin the “circle” of the dress shut yet, but you can put in a few folds to hold it in place for now.
4. First, we want to sew the top, holding those pinned folds in place. Run a few seams to ensure it holds. Place back over your mannequin UPSIDE DOWN (with top of the fabric against the hoop skirt) and pin the top circle together.
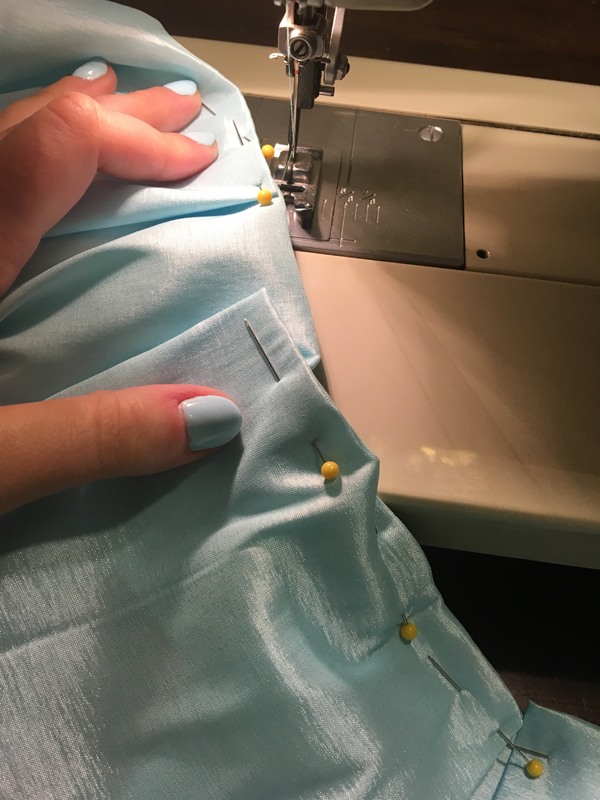
Now, pin down the long seam that runs from the waist to the floor, ignoring the excess fabric. Take off of your mannequin and sew along the seam you just pinned leaving about 12-13 inches from the top of the waist (for the zipper). Then you can cut off the excess “triangle” of fabric. Flip the skirt back right-side out so that this newly sewn seam is on the inside of the skirt.
5. Place your zipper on skirt by first placing it handle side down on the outside of the skirt and pinning the edge, lining the top of the zipper with the top of the waist. Once it is pinned, unzip it, and placing the other half of the zipper on the other side of the opening face down, and pin. When you zip it back up, the zipper should be facing out with the fabric folded over so you won’t see the seam.
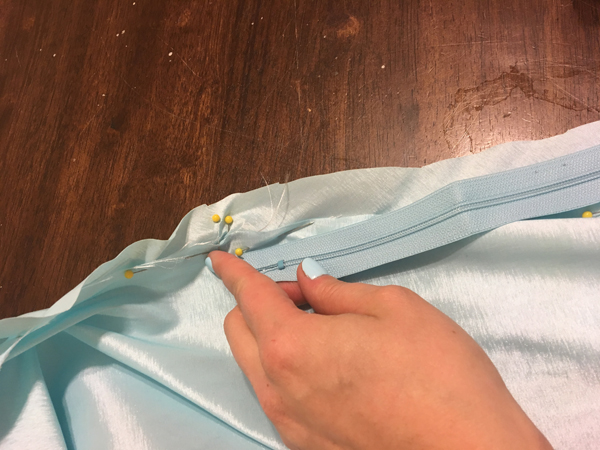
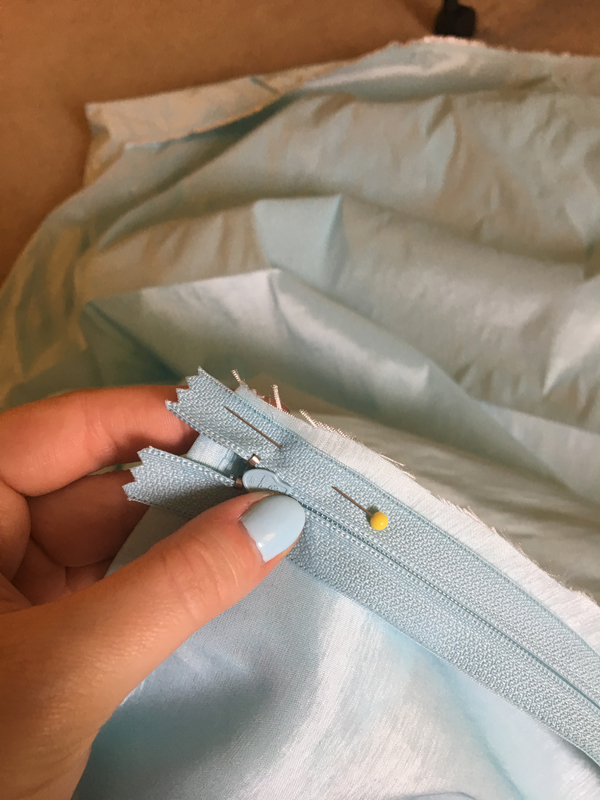
Leaving the zipper un-zipped, sew on each half to the dress, then finish the seam through the bottom (make sure to do this with the dress inside out!) so there is no gap.
Trim the top part of the zipper that sticks up above the top, then sew in the hook clasp at the very top.
6. Hang the skirt back over the mannequin and hoop skirt. This is where having the mannequin your hight is SUPER helpful. Pin the hem so it just brushes the ground, then sew the hem. If you don’t have a mannequin, you will have to recruit help in the form of someone to pin it while you wear the hoop and skirt.

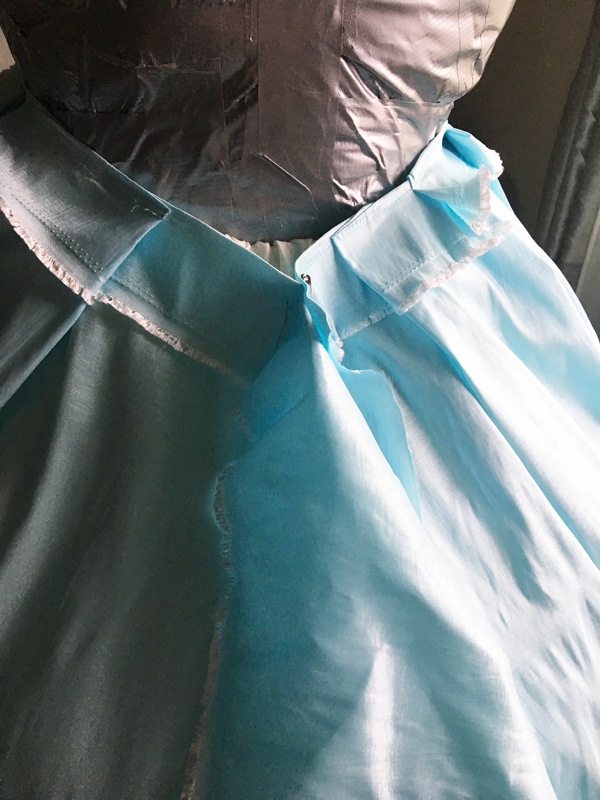
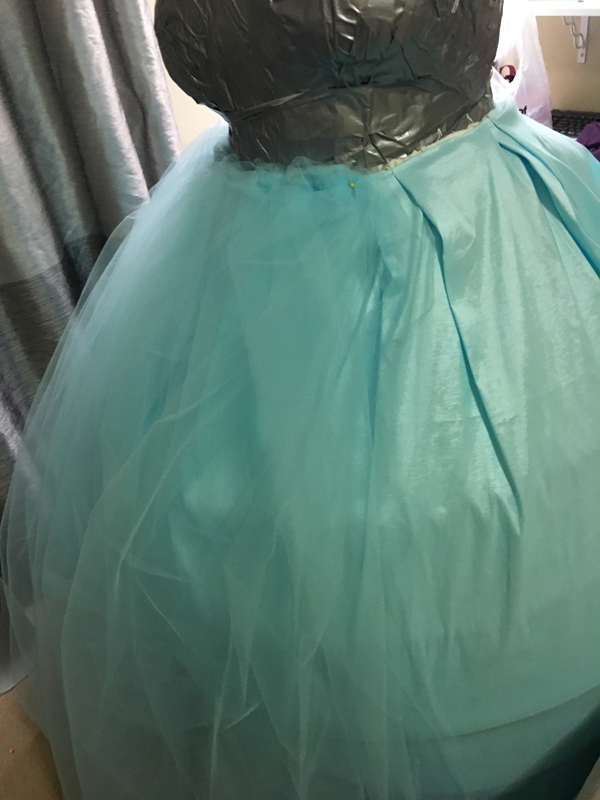
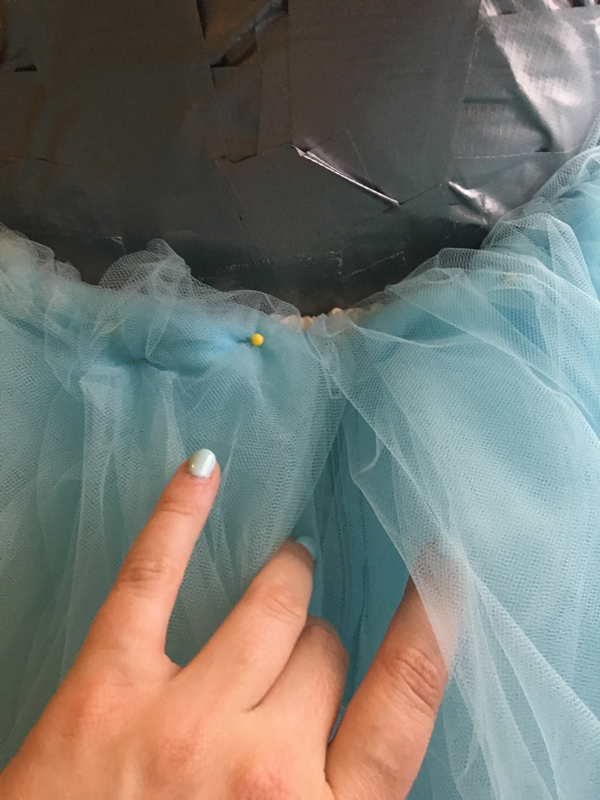
7. Back onto the mannequin! Now its time to start the over layer of tulle (or organza, etc.) I wayyyy underestimated the amount of fabric I would need… even using the hoop skirt! I started with a 15 ft. length and made it just over halfway around, folding it in layers the same way you folded the waist of the bottom skirt. Make sure to get it nice and thick, since you want the tulle to have good density at the bottom of the skirt.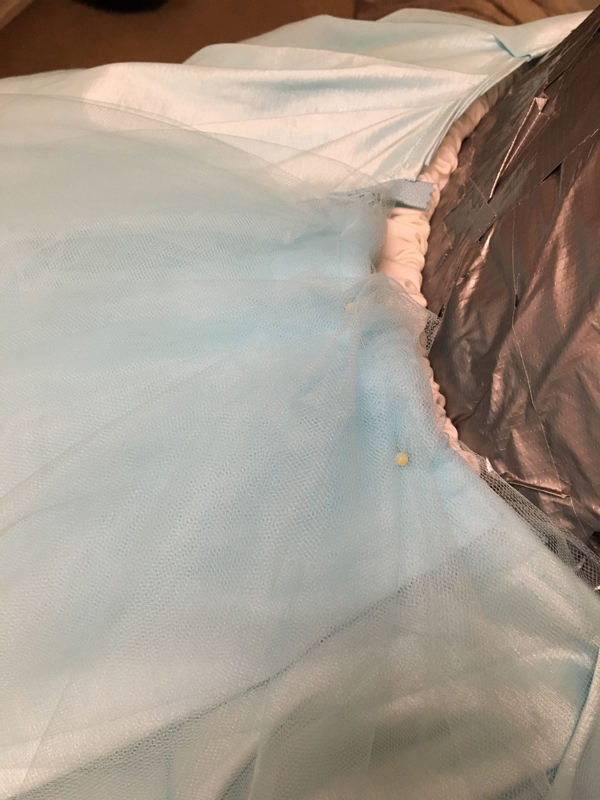
I ran my fabric horizontally so I could lay it in all once piece, and luckily I didn’t need to trim the length. I left the hem raw, but you could easily cut it leaving it raw.
8. Now you will need to do some hand stitching. You could probably do it with a machine, but after I had broken my sewing machine needle on the corset (see below) I was a bit more skittish with anything that wasn’t more straight forward. Carefully place stitches at one inch intervals around the skirt to secure the tulle in place.
9. To make things simpler, I went with a pre-constructed corset instead of making my own, and purchased a front-zip white satin corset from AMI Clubwear. While the construction, quality and price of the corset was great, their sizing was not. I went with the size indicated by actual measurements, which to me seemed huge… but I thought it was just the brand or because it was a corset. Basically, I bought a 4X when honestly, I probably needed a 1X, and should have gone with my gut since corsets (at least here) are non-returnable/exchangeable.
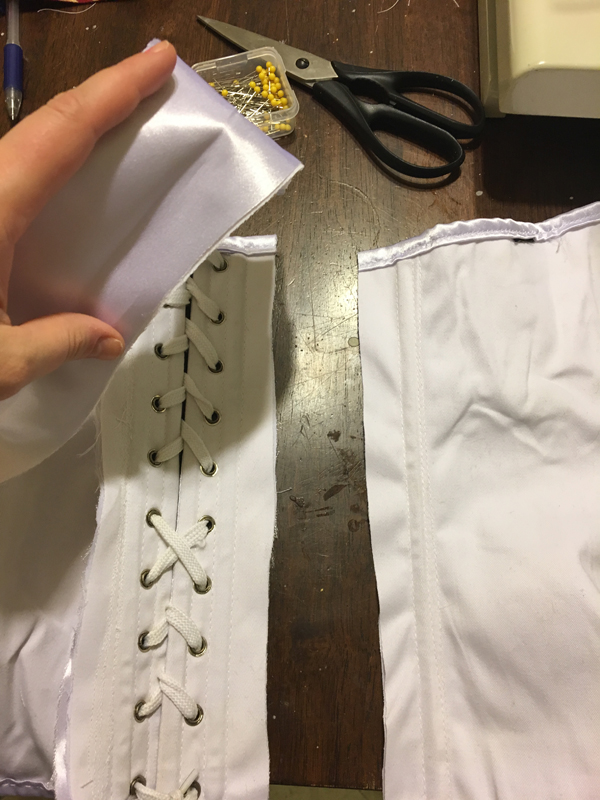
To fix this, since I am too cheap to just buy another corset, I cut out one entire section of the corset in the back on each side, leaving about 1 inch on each side of the boning to sew together. Unfortunately, I was trying to sew so close to the boning, I hit the boning with the needle and bent it… the when I tried to straighten it actually broke it off. Don’t try to straighten bent needles!!!! Its likely a HUGE safety issue. Just replace it… its super easy and cheap.

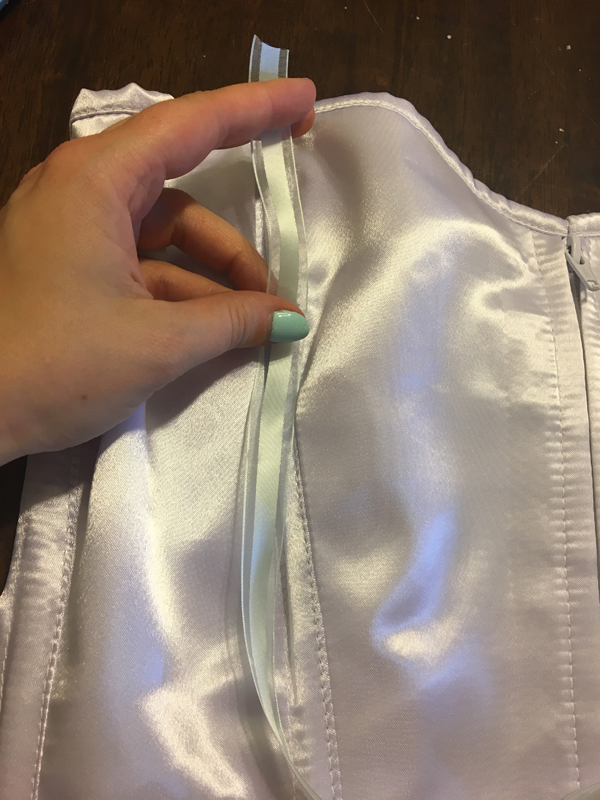
10. To finish off the corset and make a subtle tie in to the skirt, I used a semi-translucent 1/4 inch ribbon that matched the color and hot glued (YES! Hot glue all the things!) the ribbon over each bone in the corset. Leave an extra 1/2 inch of ribbon off of each side so you can fold it over to the inside of the corset and secure.
That’s it! Again, I highly recommend wearing this with a hoop skirt to really get it to flare, but it also looks great when left to hang on it’s own. Without the hoop, this dress would likely need to be hemmed a bit, however, I actually didn’t mind the extra volume after removing the hoop, and it could easily be removed after the ceremony or during a reception. Now it’s time for tea!


 Hi! I'm Alyce.